Tips and tricks for hiking hydration, water bladders, keeping feet happy, avoiding aches and pains – as well as how to get out on the trail quickly.
Hydration
How much should I drink to stay hydrated?
Everyone is different, and is also depends on the temperature and level of exertion… but a general guideline is 4 to 6 ounces every 20 minutes or so.
Better to sip a little frequently than a lot every few hours (this is where a hydration bladder comes in handy) [Source: Backpacker Magazine “Liquid Energy: Hydration Tips”]
Headaches, dizziness, or difficulty concentrating can signal dehydration while anxiety, a weak or rapid pulse, and clammy or hot, dry skin point to serious dehydration.
Also see our page on “Hiking Health“.
Water Bottles and Bladders
The two most common ways of carrying water on a hike are with water bottles (plastic or metal) or a water bladder (also called a reservoir) inside a backpack.
The pack can be dedicated to the bladder with just a little room for day hike gear, or a regular backpack with a pocket to place a reservoir.
Water bottles can be carried inside a pack, on outside pockets or in a dedicated waist belt pack.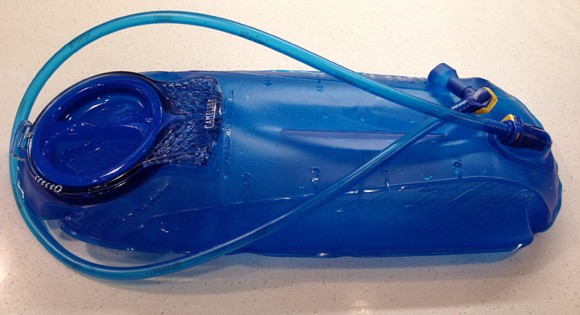
We prefer to use a water bladder inside our packs. The backpacks we use have a sleeve pocket to slip the bladder in and a hole to run the tube out and around to clip into the pack strap.
The end of the tube has a “bite valve” that releases water when you bite on it. This is an easy way to drink as you hike.
What we use: We’ve been using Camelback reservoirs for ages. Pictured is our Antidote but they have a newer model available called the Crux.
On a longer hike or in really hot weather, we add water bottles into the mesh pockets on the outside of the backpack.
For shorter hikes, we may use just bottles. Water bottles are quicker to fill and clean, but can be more awkward to grab while hiking – depending on how they carried.
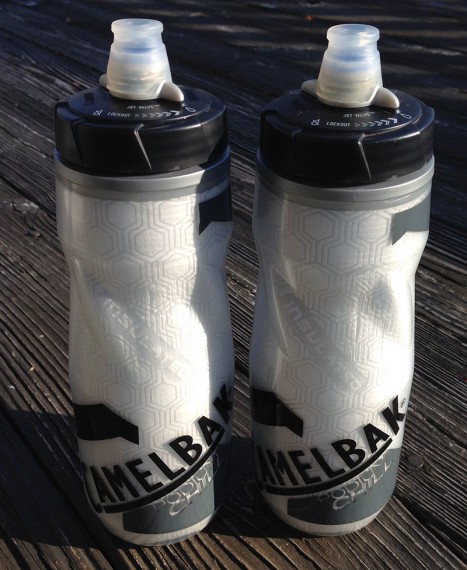
What we use: We bought two Camelback Podium Chills in 2013 and have used them constantly since – workouts, hiking, biking, kayaking, in the car, at my desk.
They’re insulated and when filled with ice will keep water cold for hours. The lockable bite valve keeps the water in no matter what.
It really comes down to personal preference to which is better. If you are new to hiking, or just giving it a go and not sure if you’ll hike much… a water bottle is a less expensive investment.
But for frequent hikers, or those doing longer hikes… we find that a hydration bladder is the only way to go.
Hydration Bladder Tips and Tricks
- Camelback makes a CamelBak Cleaning Kit that includes brushes, drying arms and cleaning tablets to keep your water bladder funk-free.
- Store your clean, dry, water bladder in the freezer to prevent mold and funk. Fold it in half, and keep the cap open. When ready to fill it, let it thaw a few minutes so it becomes flexible again.
- Fill your water bladder halfway (or more) with ice cubes to keep the water cool. Can fill the night before and chill as well.
- Try adding an electrolyte tablet like Nuun or a powder like Skratch Labs Hydration Mix (our current fave) as they add a little flavor, vitamins and minerals… and getting enough electrolytes can reduce your chance of hyponatremia.

Keep your feet happy
Never underestimate the importance of foot comfort.
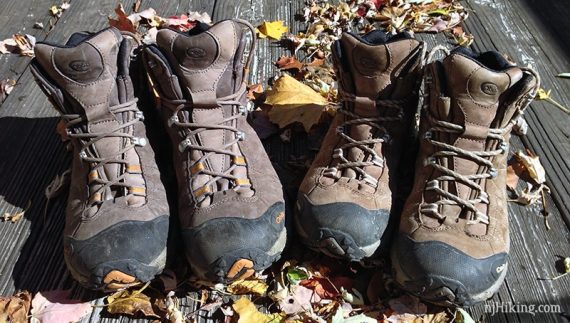
- Start with good hiking footwear. This is one area you shouldn’t skimp on.
- Channel your inner Mr. Rogers – swap out shoes at the start and end of your hike. Drive to the trail head in something comfy like Merrell’s Mocs or sandals, change into boots, then at the end of the hike change back into the comfy shoes. Put on a fresh pair of socks as well.
- Rejuvenate your feet by removing boots at a lunch or snack break; let them cool down a bit. A few seconds of foot massage also works wonders.
- Elevate your feet/legs up when you take a break. Prop on a rock or log, or cross one ankle over the other knee when laying on your back… anything to get the feet/lower leg up a bit.
- On long hikes, try soaking your feet in a clean stream or lake for a few minutes to reduce heat and swelling.
Avoid aches and pains
- Stretch your muscles: do some light stretching after a few minutes of hiking, at your breaks, and when you are done. Improves your hike AND your recovery the next day.
- Add dried blueberries or tart cherries to your trail mix. They both reduce inflammation, which is a major cause of joint pain. They’re tasty and your knees will thank you.
- Consider using trekking poles to reduce the impact on your knees.
- Consider taking an ibuprofen (like Advil) about halfway through a long hike if your knees tend to get cranky. Ibuprofen reduces inflammation.
- Milk can be a good food for muscle-recovery. In our opinion, this also means that after-hike ice cream is “medicinal“! This goes for coffee as well… we lean towards iced vanilla lattes in the summer. Or once we’re home we might whip up a banana smoothie – blend a ripe frozen banana with milk, a generous dollop of peanut butter and squirt of Hershey’s syrup… yum.
Get out and go – quick!
Time is short, the weekend is coming… don’t waste time scrambling to get ready.
- Keep your backpack packed with the basic essentials: First aid kit, compass, tissues/TP, hand sanitizer, and possibly headlamp/flashlight, pocketknife and fire starter.
- Keep boots, trekking poles, hats/gloves, bug spray, suntan lotion etc in an old duffel bag, along with the pre-packed backpack, ready to grab and toss in the car.
- Pick a trail ahead of time. For the New Jersey area, check out our Hike Finder.
- Gather up trail maps and directions and add to the duffel.
- Charge your camera/GPS batteries the night before. Toss in the pack the next morning.
- Fill water bottles/bladders in the morning (or chill in the fridge overnight).
- Toss energy bars or trail mix into the backpack, grab your duffel and go!